- Symmetric vs. Asymmetric Signing
- A High-level Overview of Authentication Flow in Web Apps
- HTTPOnly Cookies
- Conclusion
Symmetric vs. Asymmetric Signing
A JWT is signed with a scecret key to ensure its integrity. There are two signing strategies—symmetric and asymmetric signing.
- Symmetric signing uses the same key for both signing and verification.
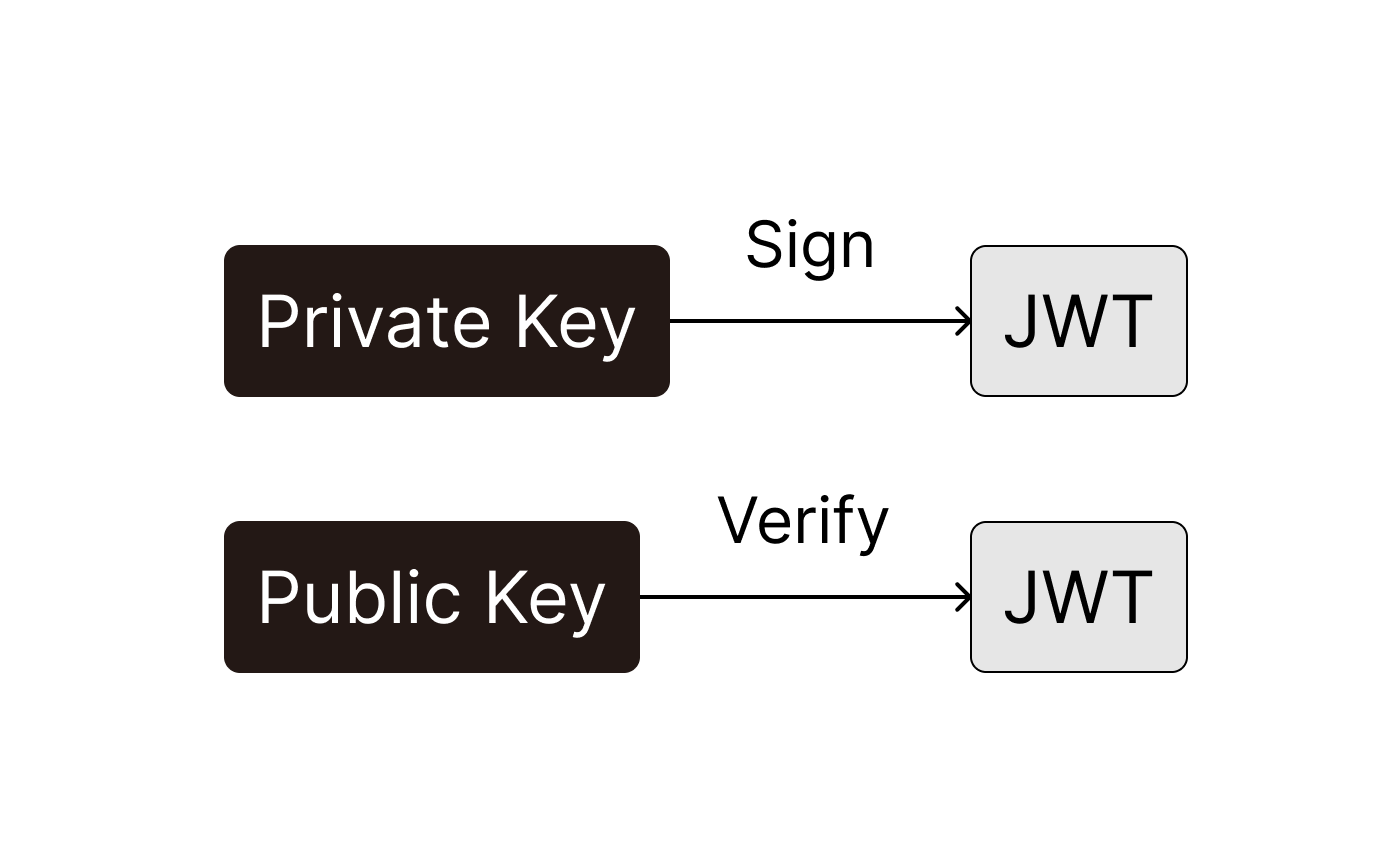
- Asymmetric signing uses different keys: a private key for signing and a public key for verification.
Symmetric Signing
In symmetric signing, both the authentication server and the application servers share the same secret key. This method is fast and efficient because the verification process is straightforward. However, it has a major security risk: if the key is exposed, anyone with access to it can generate valid JWTs, leading to potential security breaches.

Symmetric signing is most suitable for cases where you have full control of the system within which JWTs are used.
Asymmetric Signing
With asymmetric signing, only the authentication server holds the private key used to sign JWTs. Application servers or third parties verify the JWT using a public key. This way, even if a hacker gets access to the public key, they cannot generate valid JWTs without the private key, ensuring better security.
Asymmetric signing should be used when multiple services and third-party clients need to verify JWTs without sharing the signing key.
JWT Verification Process
Regardless of the signing strategy used, the application server checks:
- The signature of the token to ensure it is not tampered with.
- The expiration (
exp) to ensure it is still valid. - The
issandaud, where applicable, to confirm it comes from a trusted source.
A High-level Overview of Authentication Flow in Web Apps
The authentication flow in web applications using JWTs looks like this:
1. User sign-in
The user submits their credentials (e.g. username and password), to the server.
2. Server generates JWT
If authentication is successful, the server generates a JWT, signs it using either a shared secret (symmetric) or a private key (asymmetric), and sends it to the client.
3. Client stores JWT
The client stores the token—typically in cookies—and includes it in subsequent requests.
4. Server verifies JWT
The server:
- Extracts the JWT from the cookie
- Verifies its claims and signature
- Check its expiration
If valid, the request is processed; otherwise, the request is rejected.
5. Server responds with data
Once authenticated, the server grants access to requested data and resource to the client.
6. JWT cleared at logout
On logout, the client clears the token, preventing further authenticated requests until the user signs in again.
HTTPOnly Cookies
As mentioned above, JWTs are stored on the client. It is crucial to protect them from XSS attacks. HTTPOnly cookies are recommended, because Javascrit cannot access them, mitigating security risks.
Here’s how to securely store a JWT in an HTTPOnly cookie in a Next.js authentication route:
res.cookies.set("token", token, {
  httpOnly: true, // Prevents client-side JavaScript access
  secure: process.env.NODE_ENV === "production", // Ensures HTTPS in production
  sameSite: "strict", // Ensures HTTPS in production
  path: "/", // Makes the cookie accessible across the entire app
  maxAge: 86400, // Token expires after 24 hours
})
After setting the cookie, the client will automatically include it in subsequent requests.
Conclusion
In this part, we explored more advanced topics on JWT, such as signing strategies, typical authentication flows involving JWTs and HTTPOnly cookies for better security.
In the next part, we will dive into implementing JWT authentication in a Next.js application from scratch.